How Can We Help?
How to Build an Uplift Pipeline
Cortex is an easy-to-use platform that enables anyone to automate Machine Learning Pipelines from continuous streams of event data. In this guide, we’ll show you how to use an Uplift pipeline in Cortex to predict the impact of an intervention on each user’s future behavior.
What are Uplift pipelines?
Predictions from an Uplift pipeline answer the question: how is one intervention expected to influence each user’s likelihood of converting in the future? Your intervention can be any action that you take or experience that you provide in order to influence user behavior. Your definition of “converting” can be defined based on any event data that is being tracked and sent to Cortex.
The predictions from an Uplift pipeline range from 0-1, where a higher prediction means that your intervention will have a larger impact on the user’s likelihood of converting.
Before you can build an Uplift pipeline, you must first run an A/B test so that some users receive your intervention (treatment group), and other users do not (control group). It’s important that this A/B test is randomized — that is, both the treatment and control group should be made up of users selected entirely at random. This allows Cortex to gather unbiased data on how users respond to your intervention.
Note that while we’ll be using the example of predicting uplift on user behavior, your Cortex account can be configured to make predictions about any type of object tied to your event data (e.g. commerce items, media content, home listings, etc.).
When should I use an Uplift pipeline?
Like a Future Events pipeline, Uplift is used to predict whether each user is likely to convert in the future. But while Future Events pipelines predict whether each user will convert if left to their own devices, Uplift predicts whether the user will be more likely to convert if you apply some intervention compared to if you left them alone. Sample use cases include maximizing the ROI of a marketing campaign by predicting which users will respond positively to that campaign.
Uplift modeling can be extremely valuable for the right applications, but it’s not a silver bullet. What’s more, the added A/B testing requirement can be a strain on internal resources, so it’s important to know when the rewards might be worth that extra effort. Uplift modeling tends to work well when…
- Your goal is to impact short-term user behavior (e.g. a transaction). If instead your goal is to generally strengthen the customer relationship or impact longer term metrics like CLV, Future Events may be a better choice.
- You have powerful incentives at your disposal. If your intervention can’t meaningfully sway customer behavior, there may not be any uplift for your pipeline to find.
The following diagram will help explain which pipeline type is best suited for different predictions.
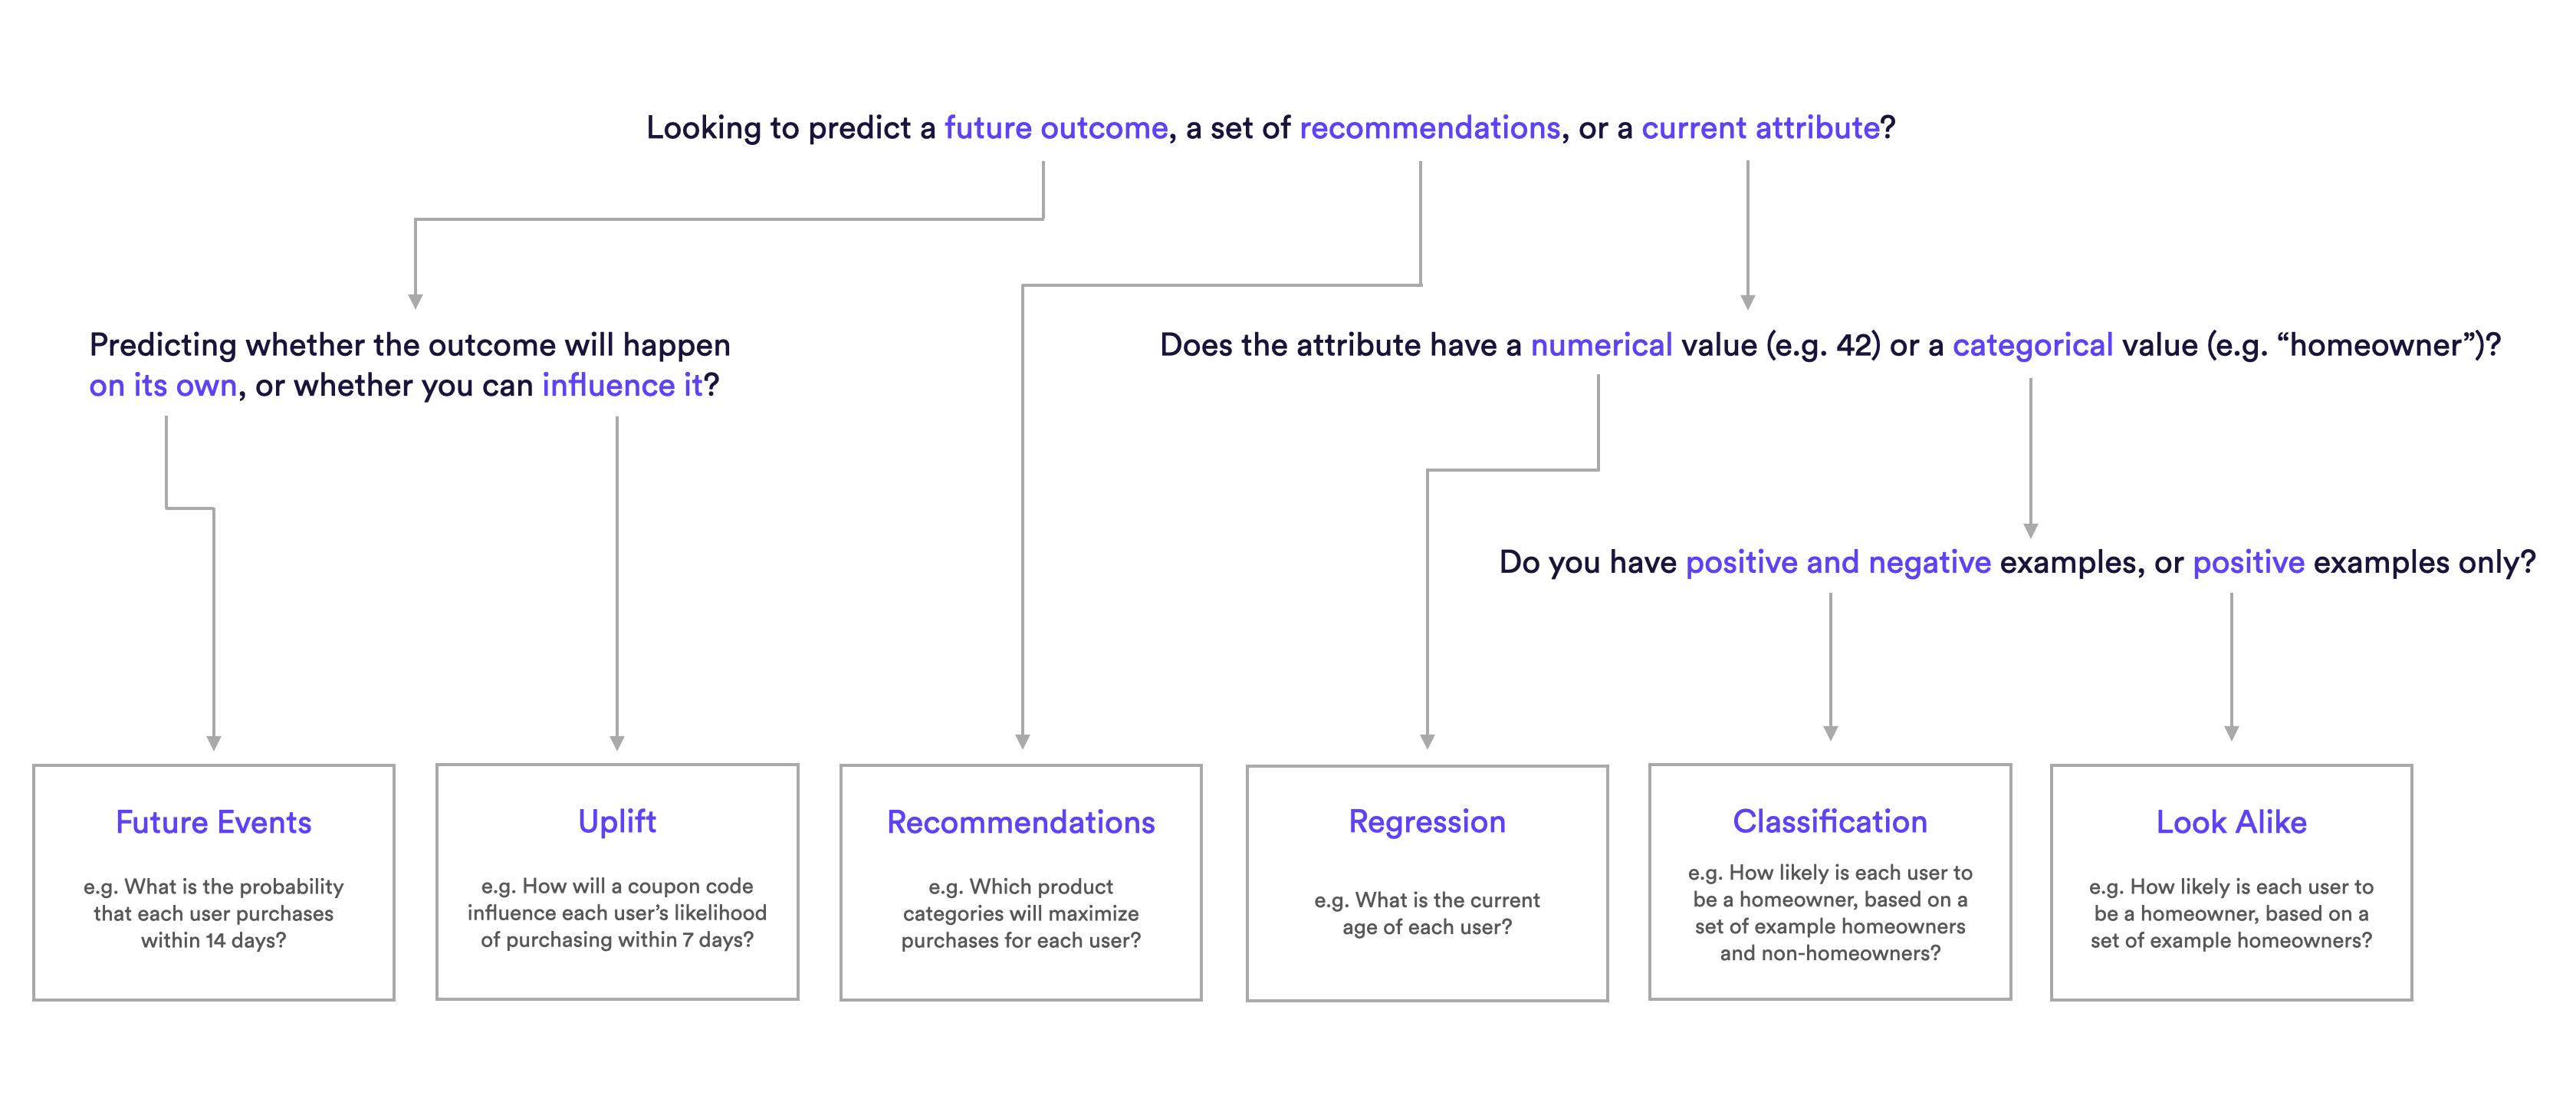
What are Examples of Uplift pipelines?
Uplift Pipeline Examples
- How will a discount change each user’s likelihood of purchasing within 7 days?
- How will a personalized email influence each user’s likelihood of churn the following month?
- Is each user more likely to subscribe with a free trial or a discounted subscription?
How do I build these pipelines in Cortex?
Uplift pipelines can be configured to make predictions in one of two ways:
- Batch – fresh predictions are re-generated for every user on a recurring schedule (e.g. weekly)
- Real-Time – fresh predictions are re-generated on-demand and in real-time as new event data is recorded for a given user
The process of building an Uplift pipeline is slightly different depending on which method you’d like to use to generate predictions over time. Expand the sections below for a step-by-step walkthrough of how to build either a Batch or Real-Time Uplift pipeline.
Batch Uplift
How to build a Batch Uplift pipeline
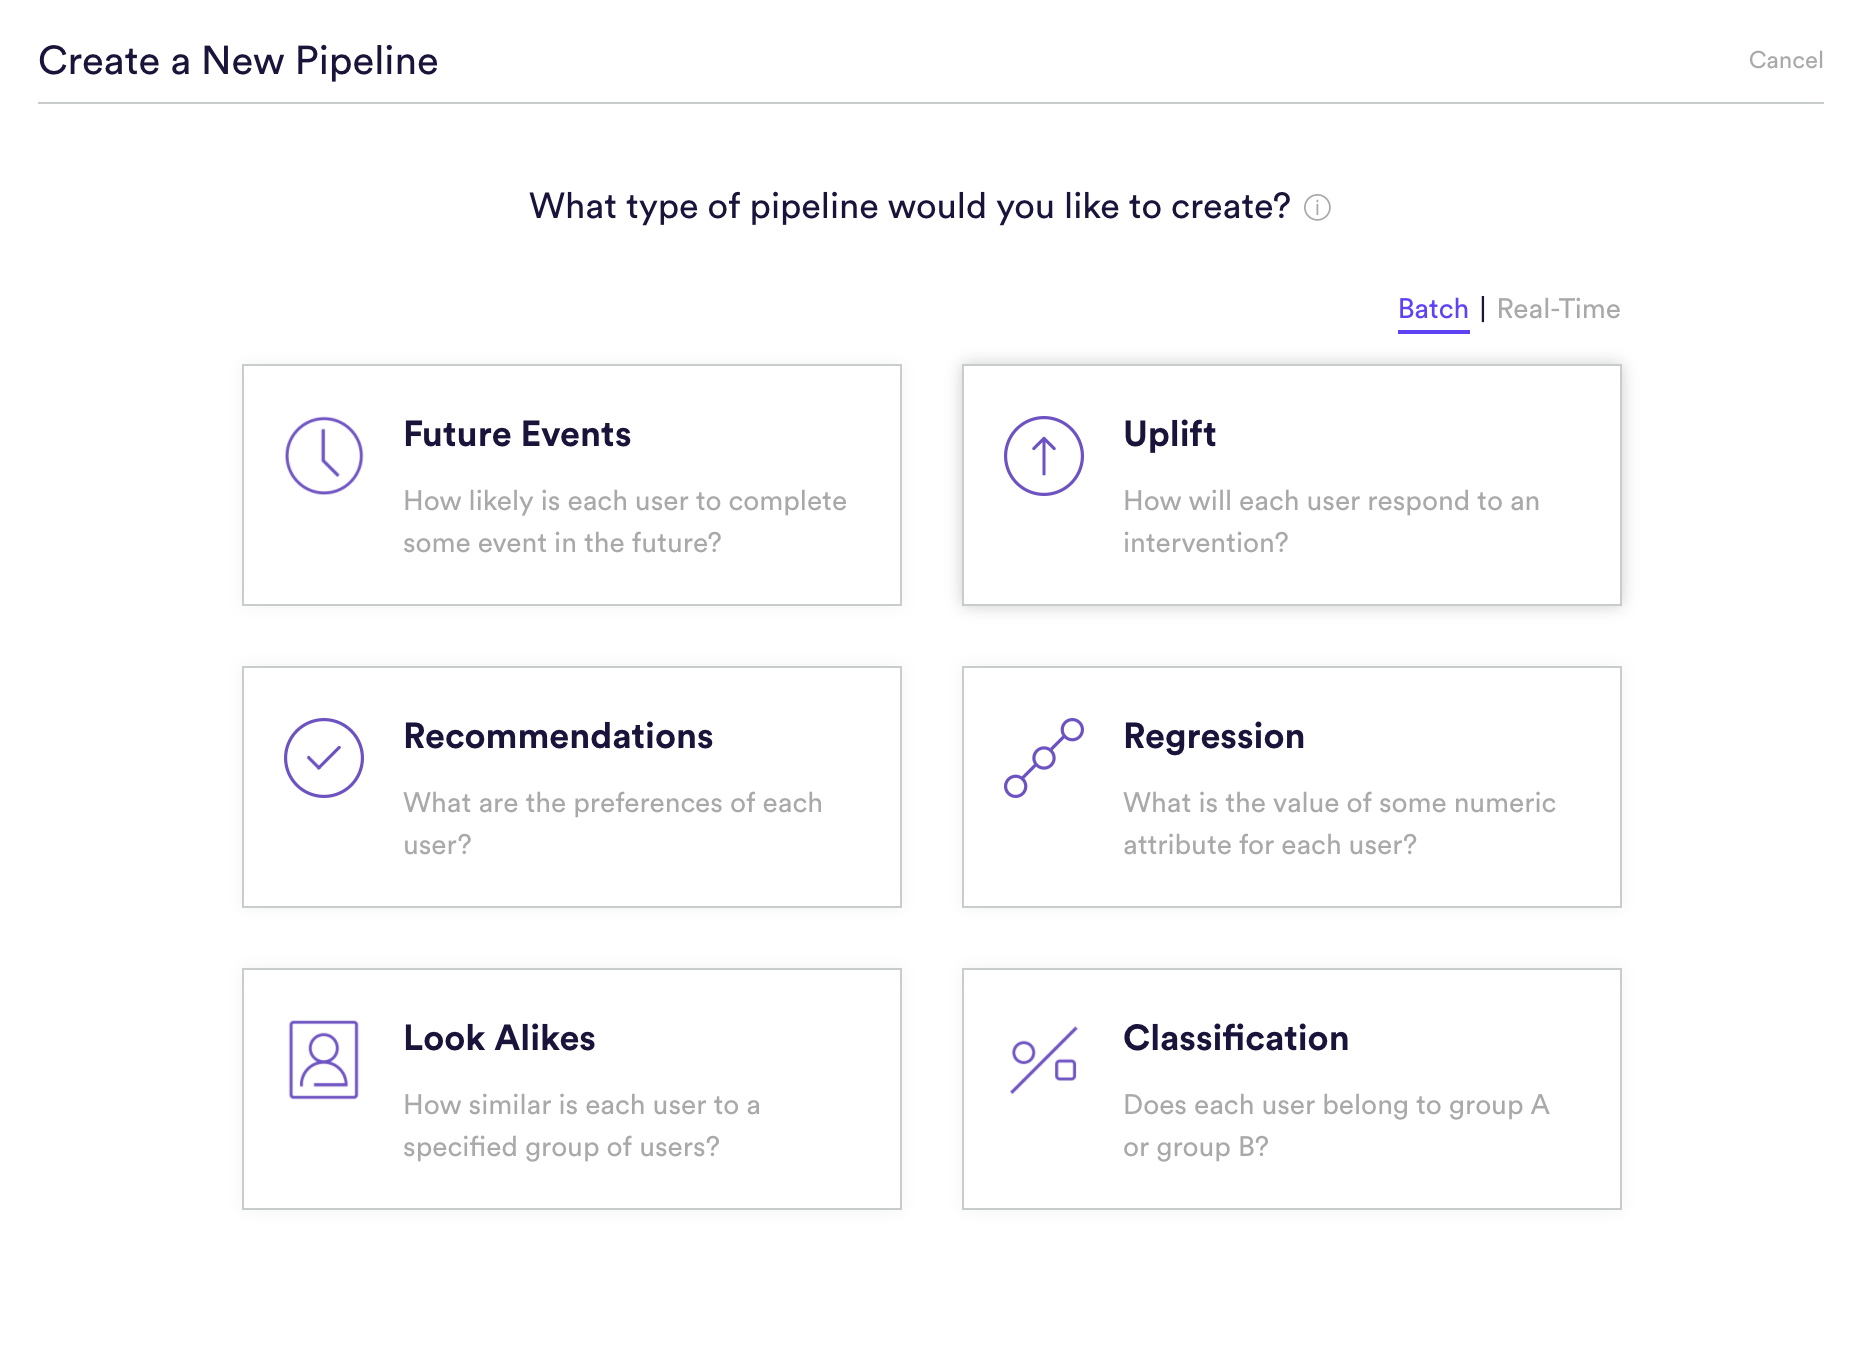
Step 1: Choose Pipeline Type
Select ‘Create New Pipeline’ from within your Cortex account. Make sure that the “Batch | Real-Time” toggle is set to “Batch”, and choose the Uplift pipeline type. Note that before you can proceed, you’ll need to confirm that you’ve conducted a randomized A/B test for the interventions whose impact you’d like to predict.
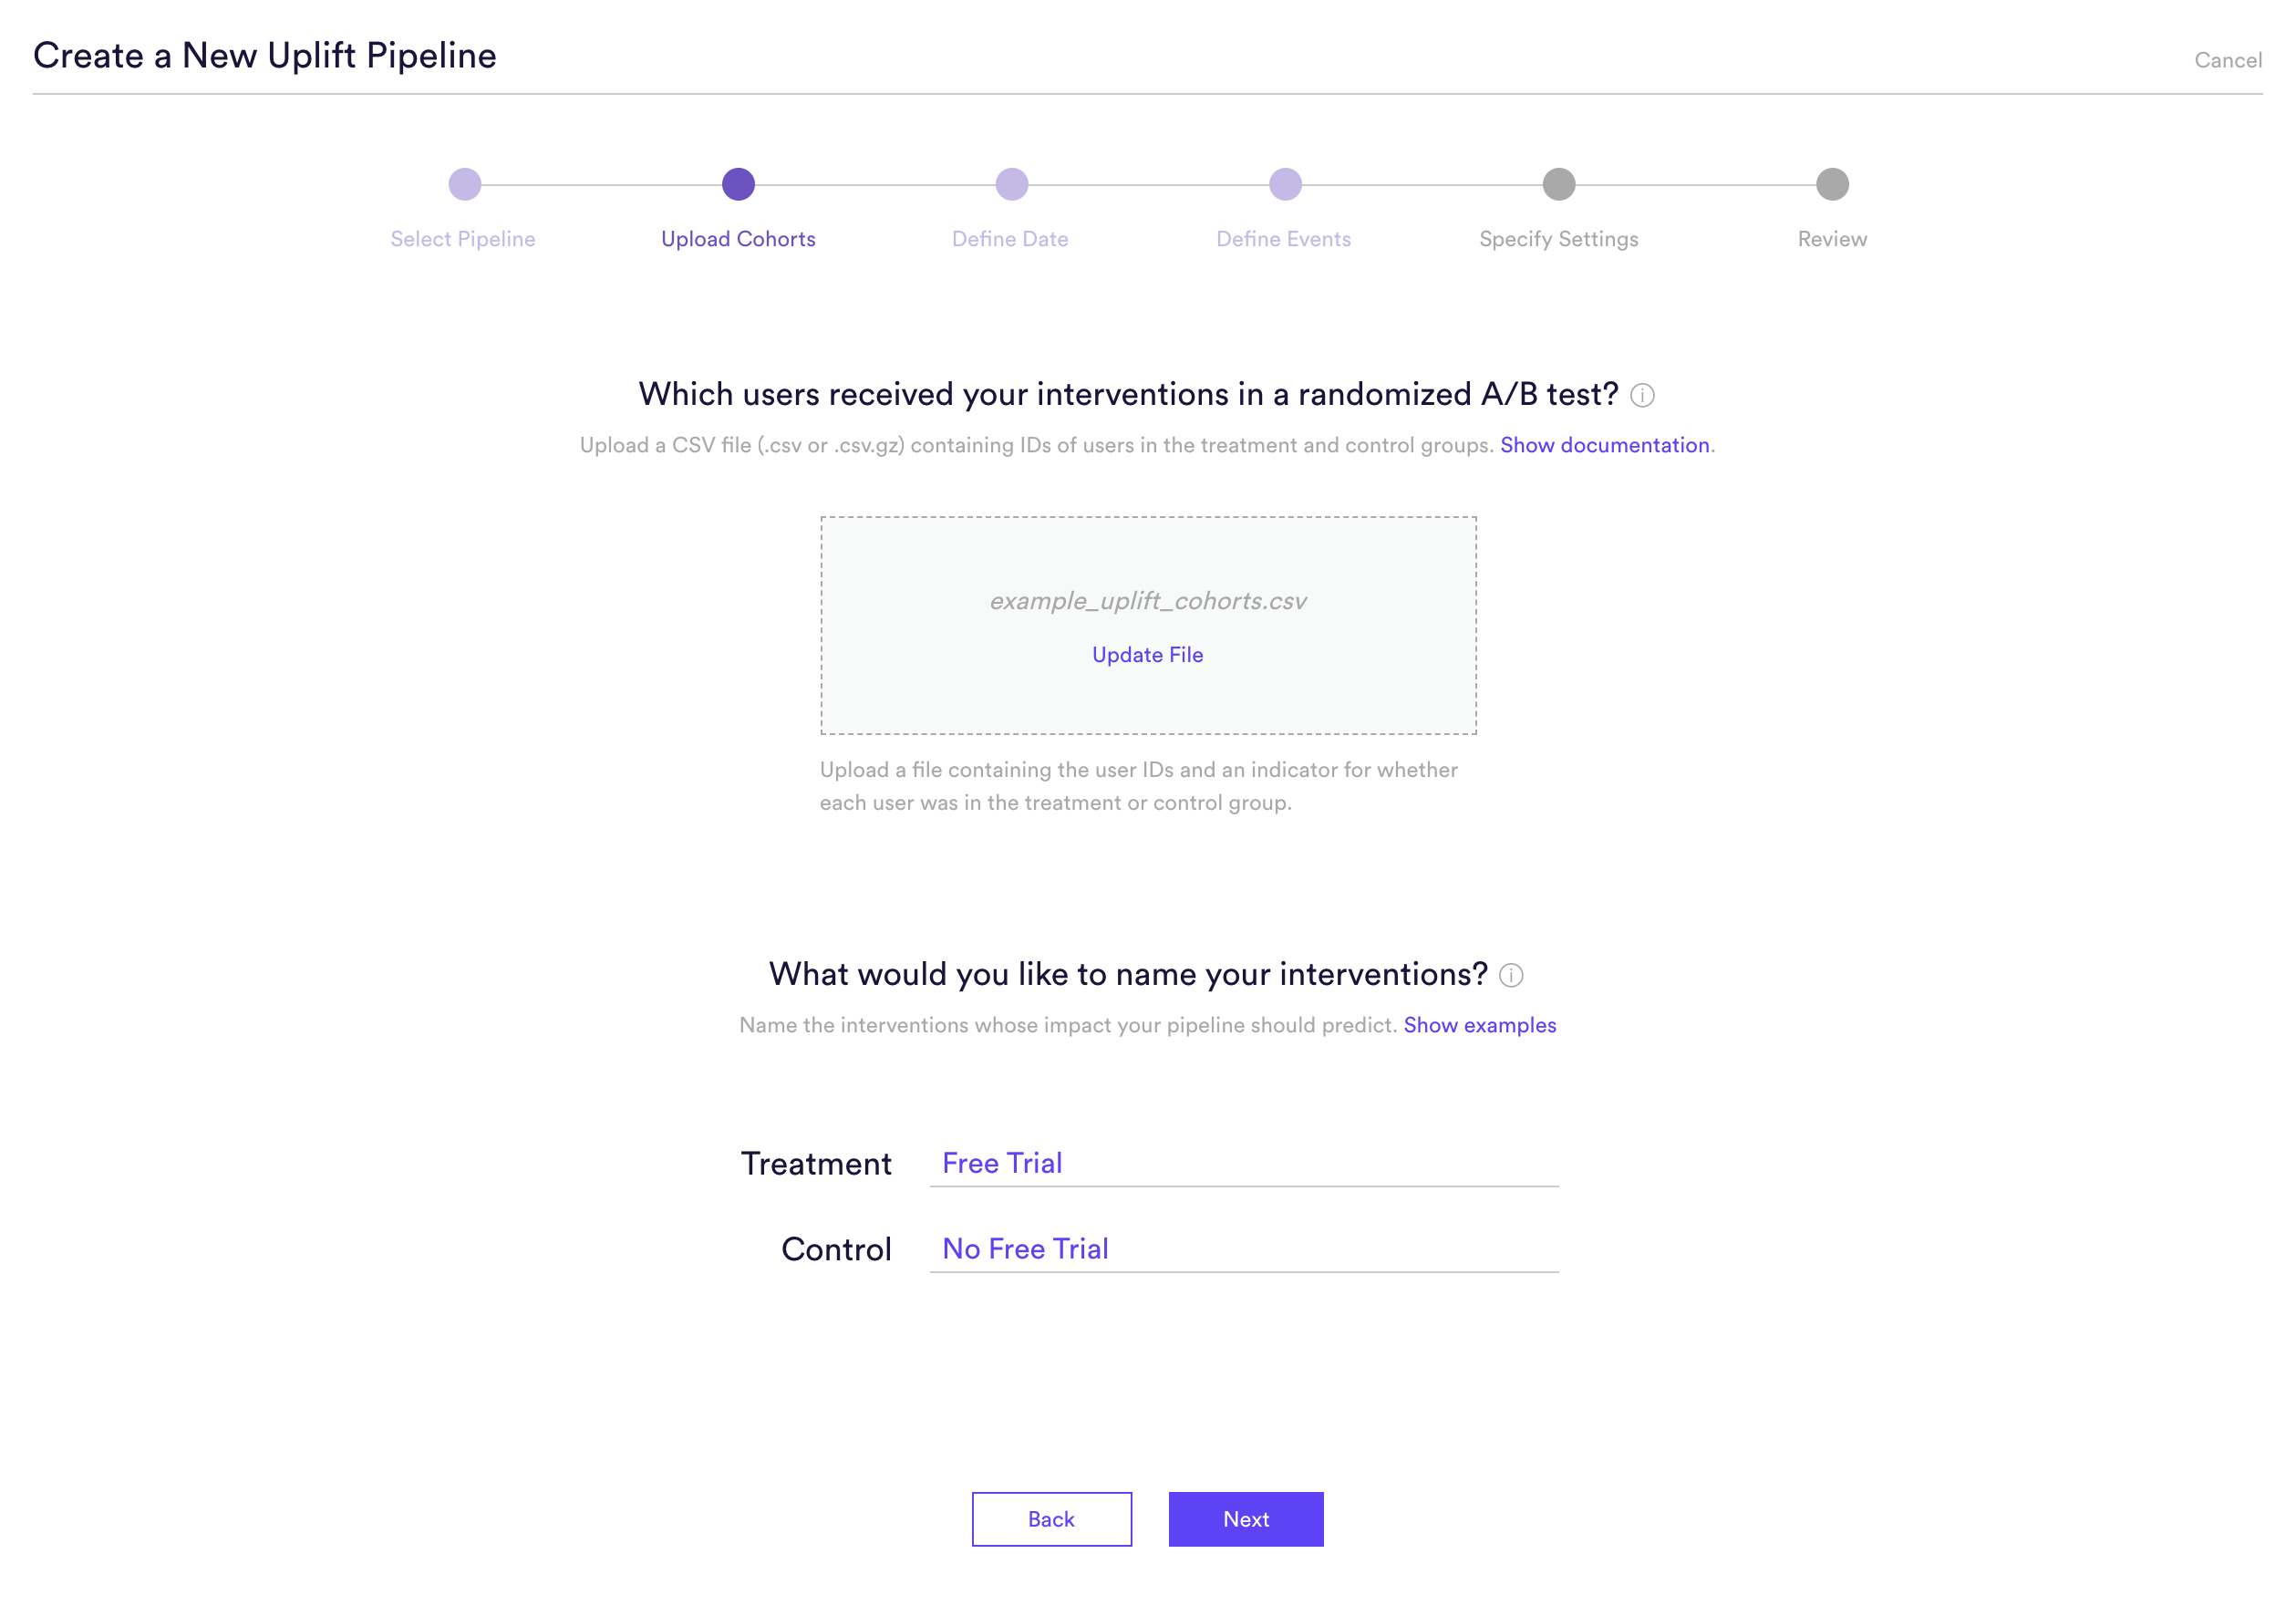
Step 2: Upload Cohorts
Upload a file containing a list of users that were included in the A/B test you confirmed in Step 1. It’s important that this A/B test is randomized — that is, both the treatment and control group should be made up of users selected at random.
Once you’ve uploaded your file, enter a descriptive name for the interventions that you tested. The names you provide will be used only to summarize your predictions in an understandable way (e.g. “predicting the impact of ____”). These names won’t have any effect on what your pipeline is predicting or how it performs.
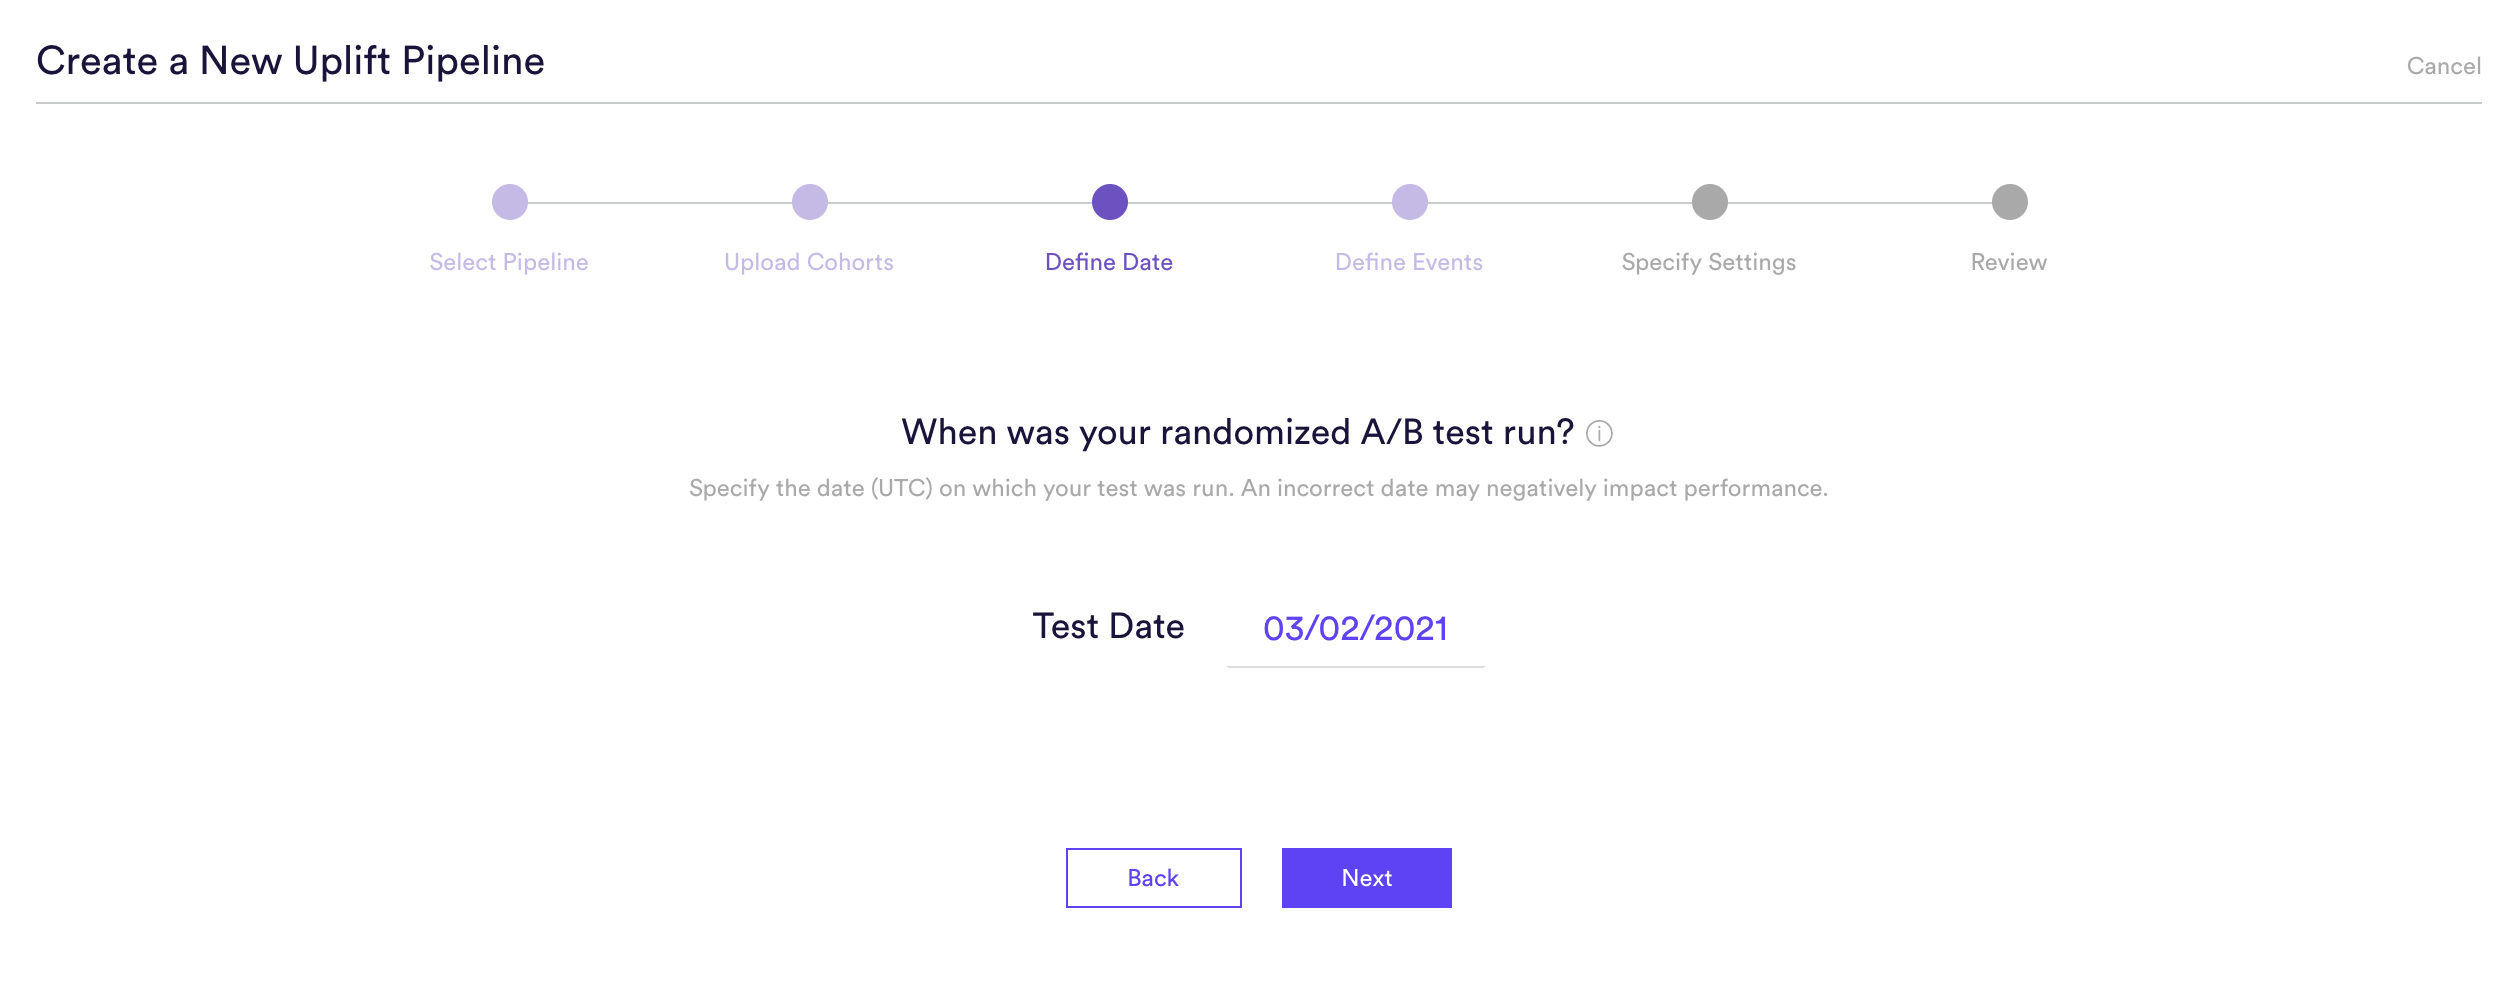
Step 3: Define Dates
Specify the date (UTC timezone) on which your A/B test was run — that is, when your test and control groups first received their interventions. Providing an accurate date is critical to building a high quality uplift pipeline — in order to learn which users will convert because of your intervention, Cortex needs to know which conversions occurred before vs. after the intervention was received.
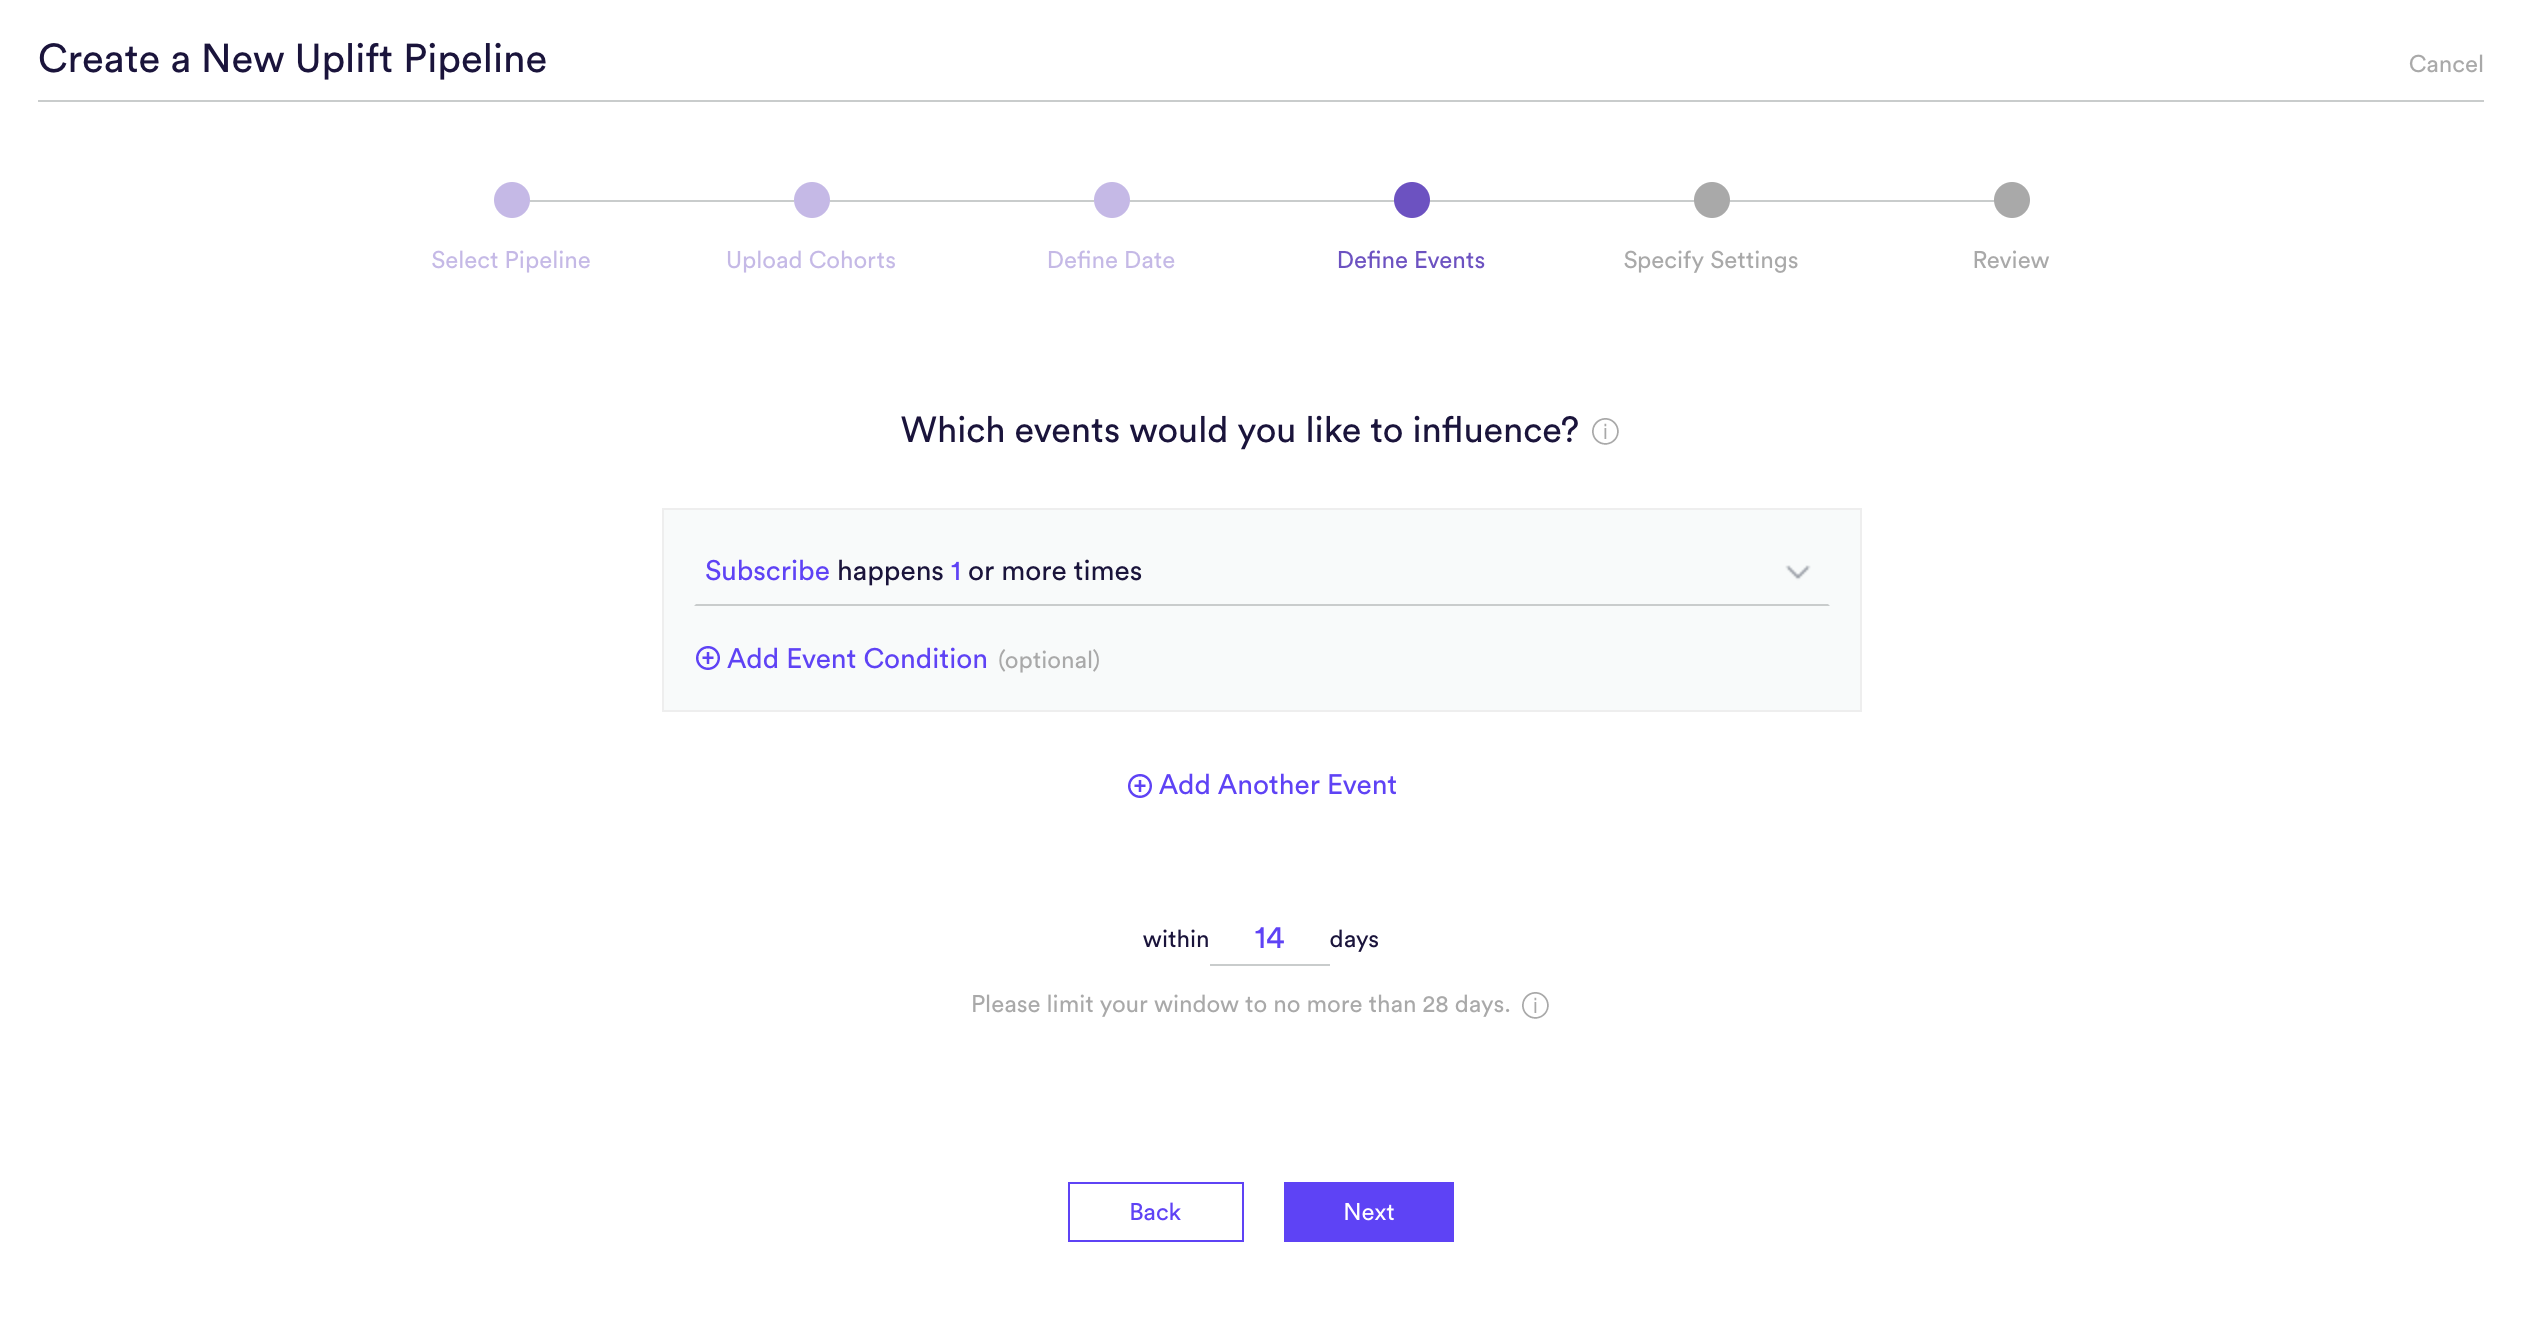
Step 4: Define Events
An Uplift pipeline is used to predict how each user’s likelihood of converting would change if they were to receive a treatment intervention rather than a control intervention. Defining this conversion means providing four pieces of information to Cortex:
- (A) Event Type – The type of event that you’d like to influence
- (B) Frequency – How many times the event must occur to count as a conversion
- (C) Event Conditions – Conditions (if any) under which the event must occur to count as a conversion
- (D) Prediction Window – How far into the future your pipeline should predict. For a batch Uplift pipeline, this window is specified as a fixed number of days. Because Cortex uses past conversion data to make predictions about the future, how far into the future your pipeline can predict is limited by how much time has passed since your A/B test.
You can define any outcome that you can describe in this way with your data. Add any number of conditions to an event, or chain any number of distinct events together using AND/OR. No matter how complex, your events will always read like an English sentence.
Step 5: Specify Settings
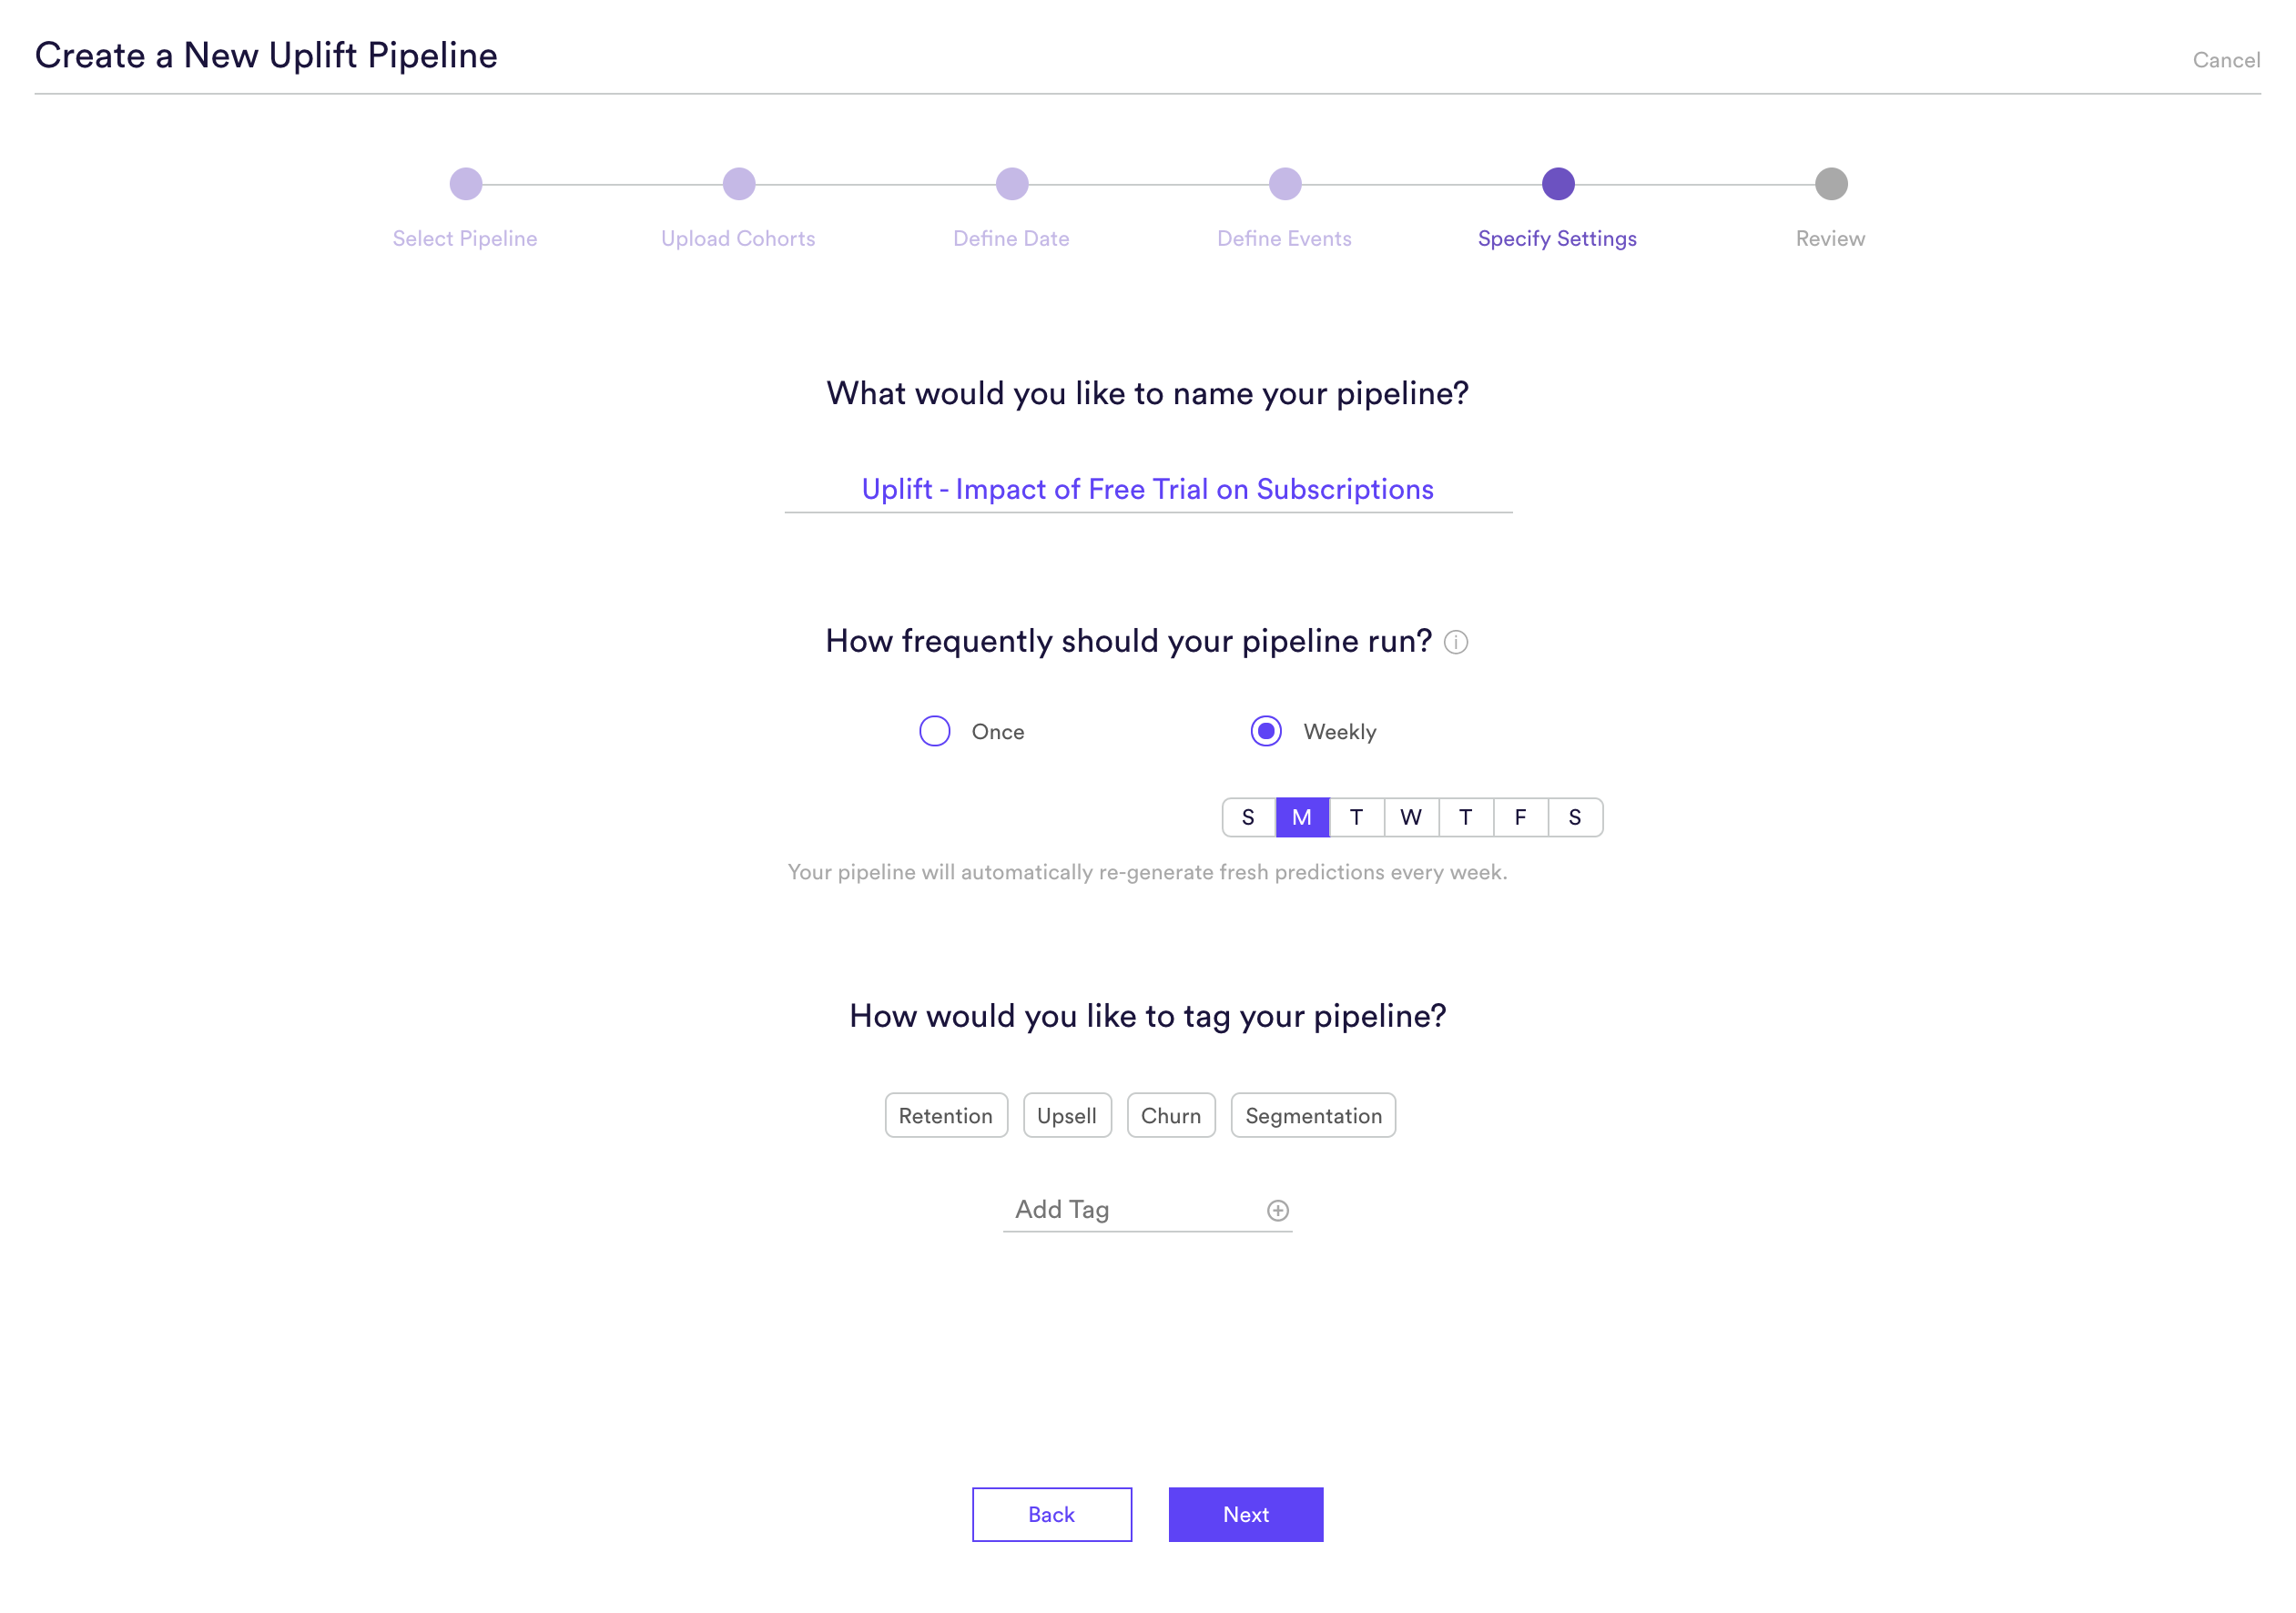
Specify settings such as your pipeline’s name, schedule, tags, and more. Finally, review that everything looks correct and begin training your pipeline!
Every time your pipeline runs, Cortex goes through the end-to-end process of generating fresh predictions from the latest data that’s been ingested. If you’d like to power automation based on recommendations that are always up-to-date, make sure your pipeline is set to run continuously. If you’re just testing things out or building a pipeline for one-time use, your pipeline should only run once.
Step 6: Review
The final step is to review your pipeline and ensure all settings look accurate! If anything needs updated, simply go ‘Back’ in the workflow and update any step.
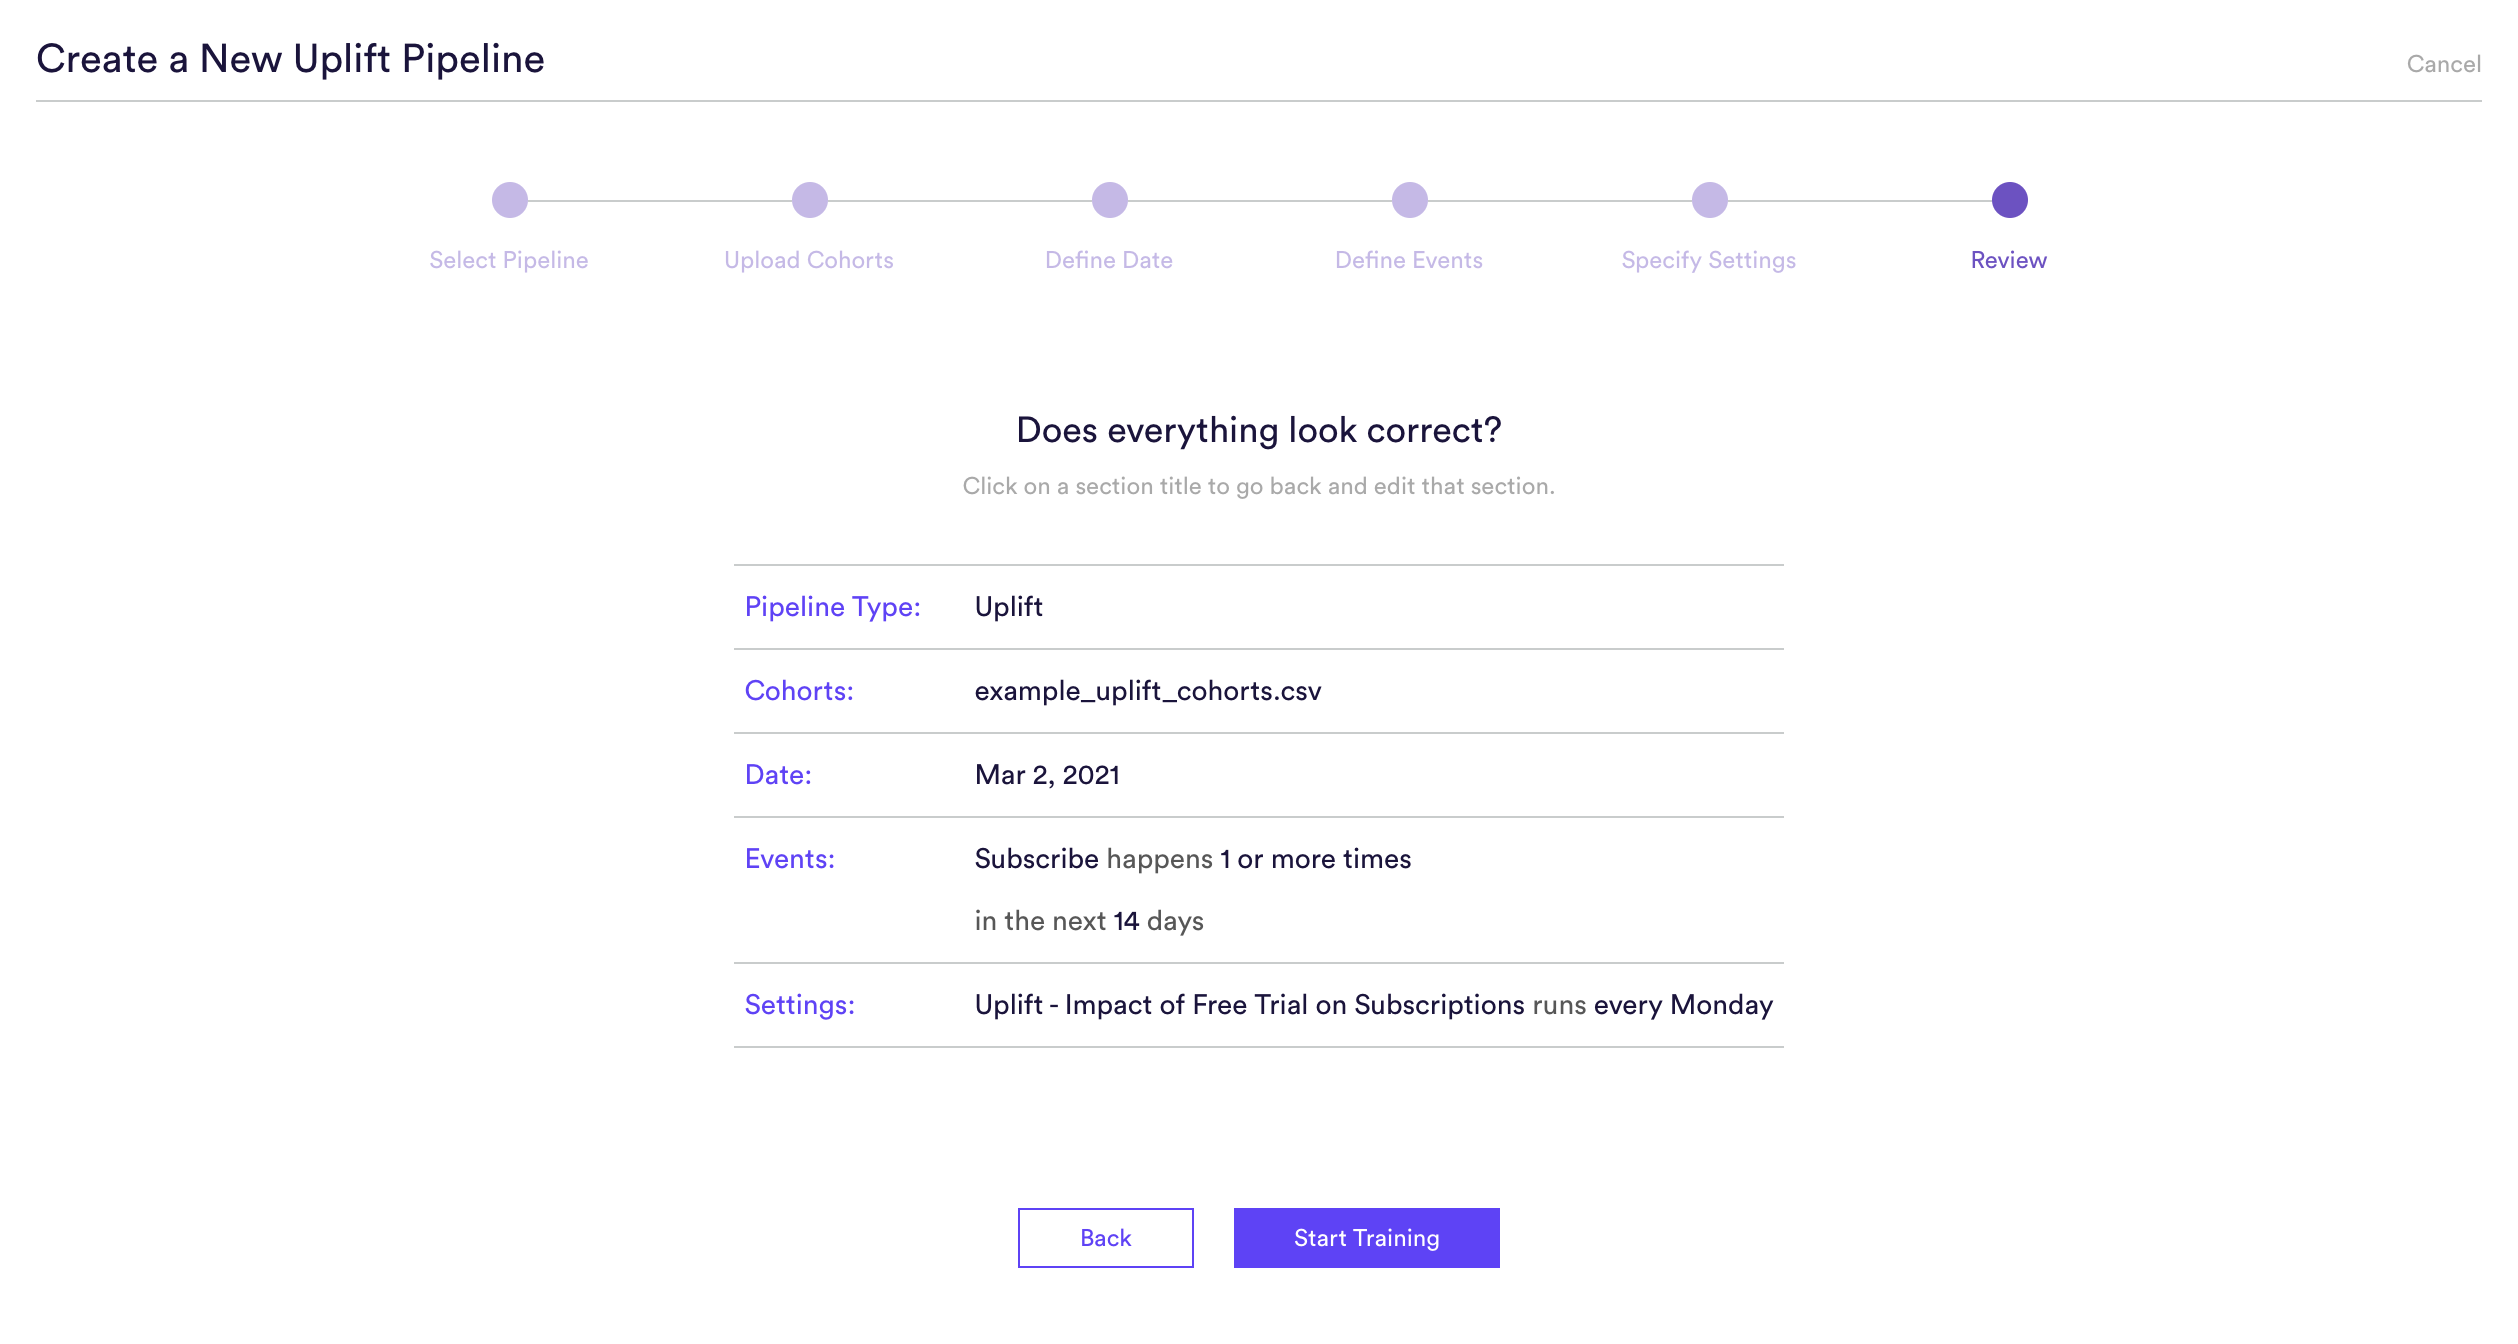
Once you hit “Start”, your pipeline will automatically begin training. Depending on how much data is flowing through your account, it could take up to a few hours for your pipeline to finish running.
Step 7: Update Cohorts over Time (optional)
If you’re re-running your A/B test over time, you can import the new cohorts into Cortex so that your pipelines are always learning from the most recent information. To upload new labels, hit the “Edit” button on your pipeline (next to “Export Predictions”), or use the Pipelines API.
Real-Time Uplift
How to build a Real-Time Uplift pipeline
Step 1: Choose Pipeline Type
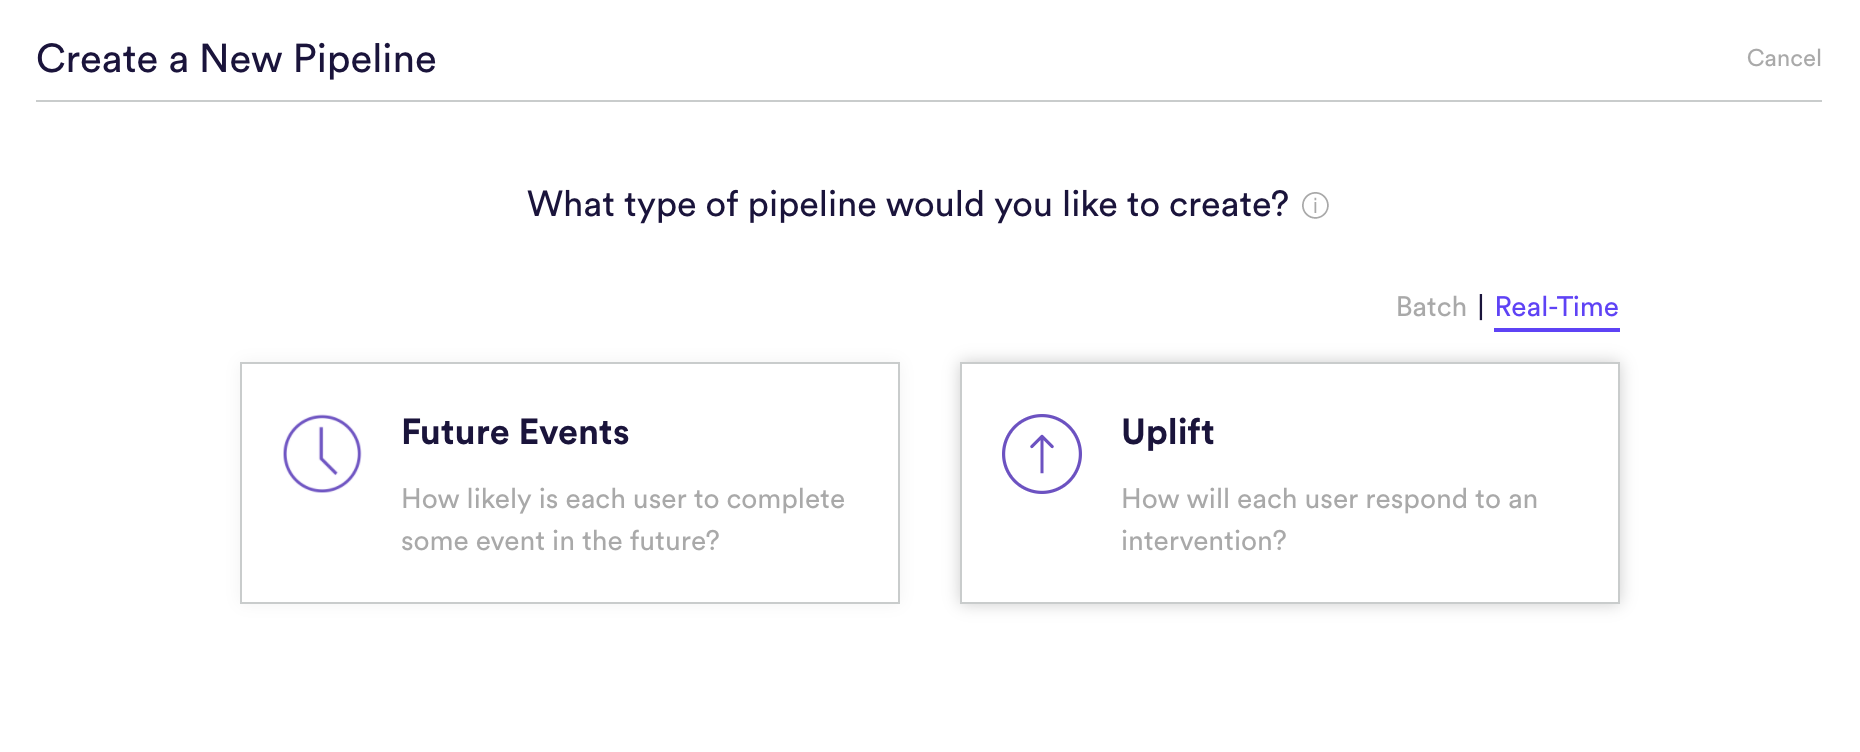
Select ‘Create New Pipeline’ from within your Cortex account. Make sure that the “Batch | Real-Time” toggle is set to “Real-Time”, and choose the Uplift pipeline type.
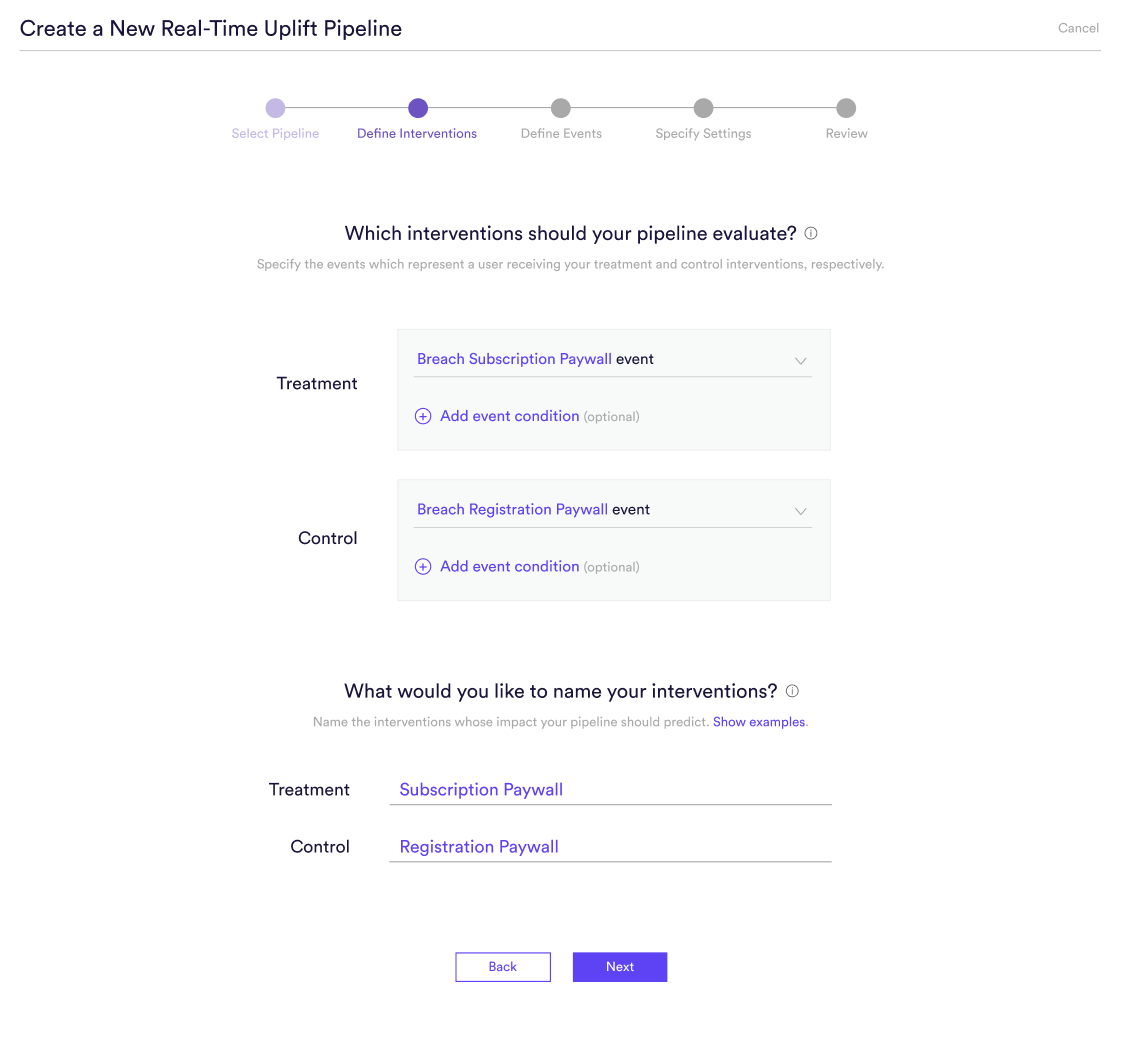
Step 2: Define Interventions
An Uplift pipeline is used to predict how each user’s likelihood of converting would change if they were to receive a treatment intervention rather than a control intervention. This prediction can then be used to choose the optimal intervention for each user.
In this step, specify the events which indicate a user receiving your treatment and control interventions, respectively. In order to build a real-time Uplift pipeline, you must track and send events into Cortex for both your treatment and control interventions, even if control equals no action (such as not being a shown a paywall).
Once you’ve specified your intervention events, enter a descriptive name for each one. The names you provide will be used only to summarize your predictions in an understandable way (e.g. “predicting the impact of ____”). These names won’t have any effect on what your pipeline is predicting or how it performs.
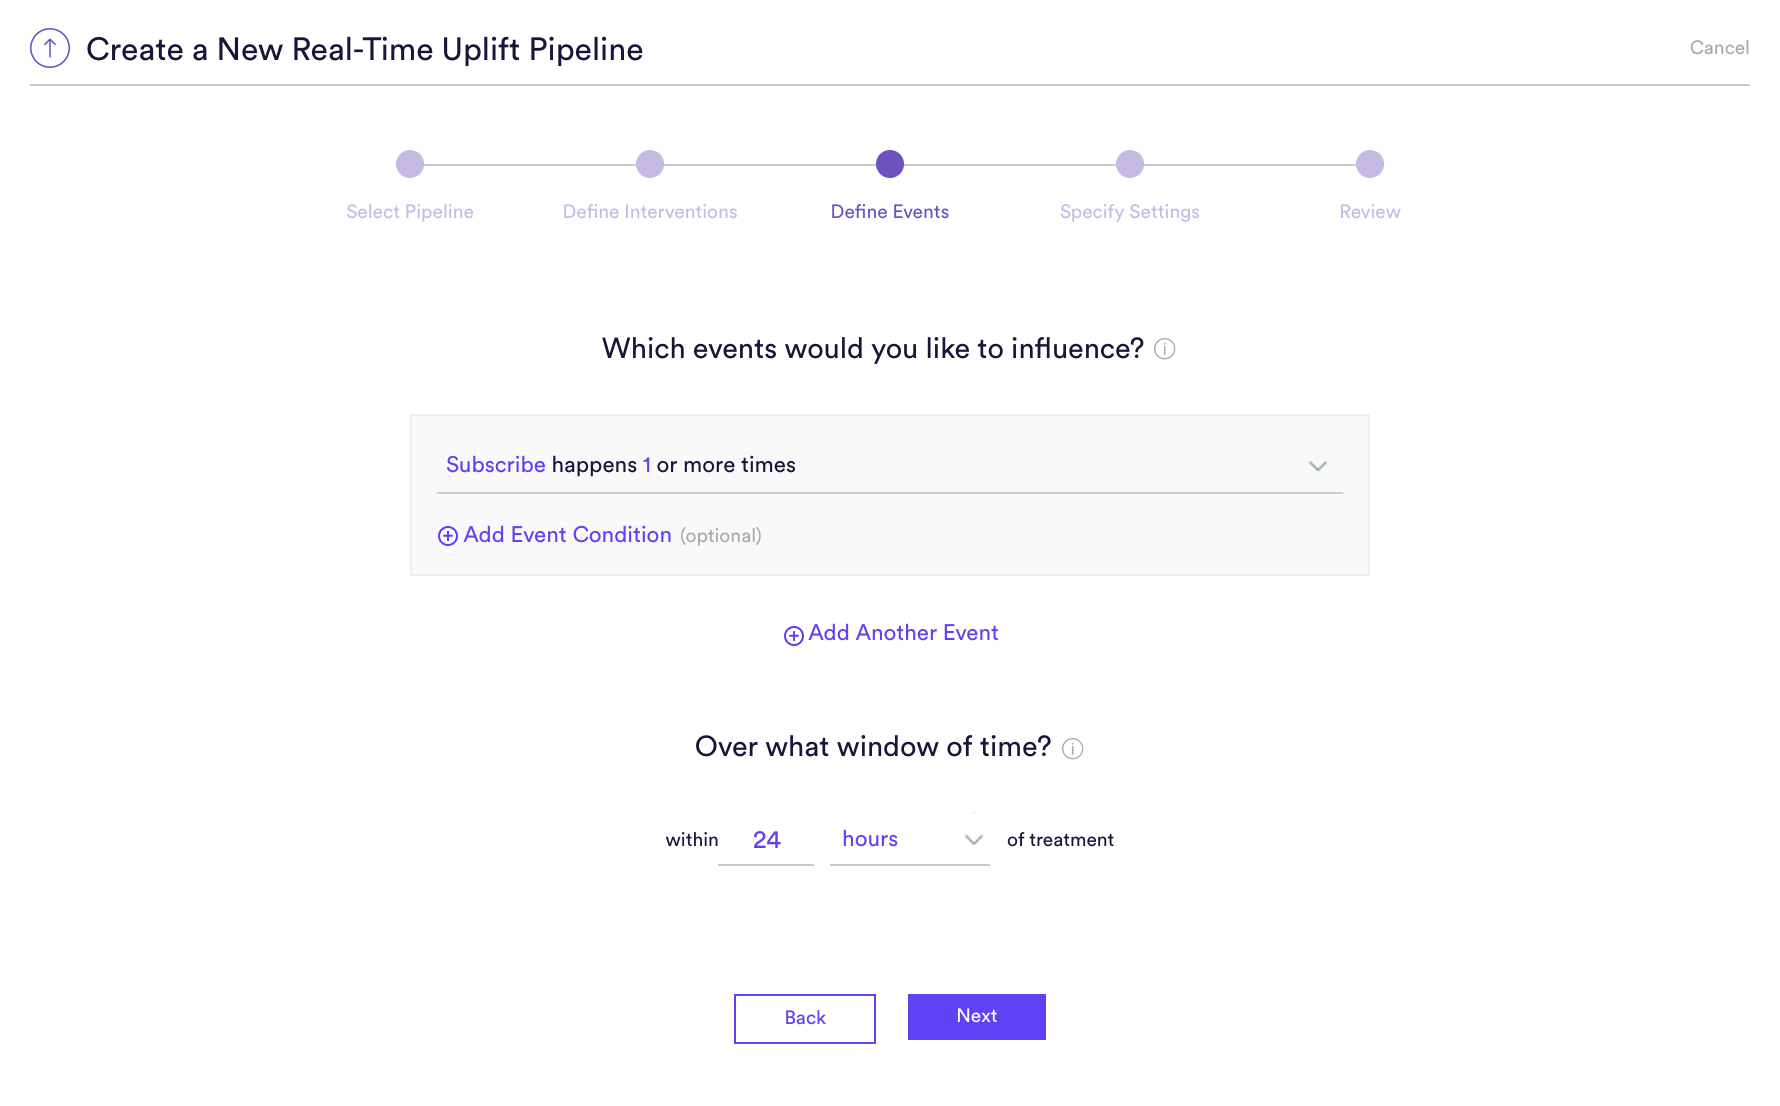
Step 3: Define Events
An Uplift pipeline is used to predict how each user’s likelihood of converting would change if they were to receive a treatment intervention rather than a control intervention. Defining this conversion means providing four pieces of information to Cortex:
- (A) Event Type – The type of event that you’d like to influence
- (B) Frequency – How many times the event must occur to count as a conversion
- (C) Event Conditions – Conditions (if any) under which the event must occur to count as a conversion
- (D) Prediction Window – How far into the future your pipeline should predict. For a batch Uplift pipeline, this window is triggered separately for each user when they receive one of your interventions (treatment or control). Specify both length of your window in seconds, minutes, hours, or days.
You can define any outcome that you can describe in this way with your data. Add any number of conditions to an event, or chain any number of distinct events together using AND/OR. No matter how complex, your events will always read like an English sentence.
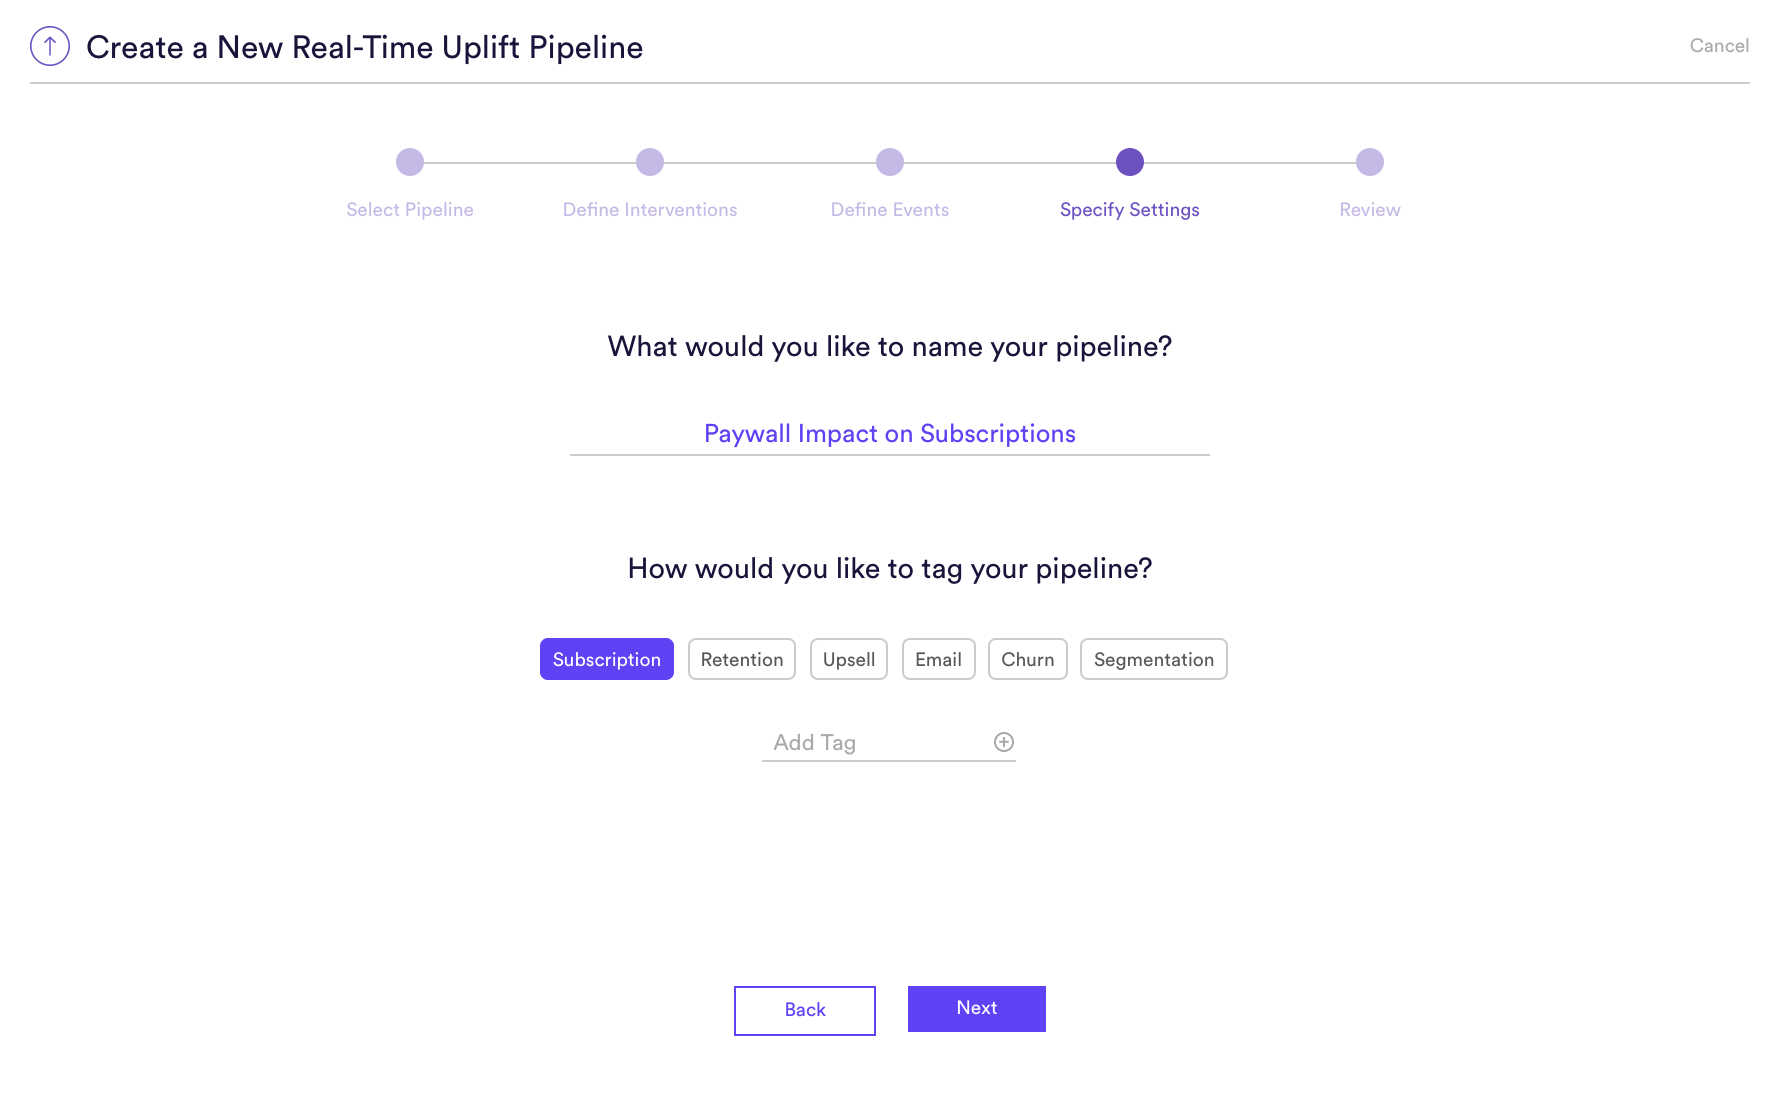
Step 4: Specify Settings
Specify settings such as your pipeline’s name and tags. Unlike with a batch pipeline, you don’t need to specify a schedule, since your pipeline’s predictions will be made in real-time and on-demand.
Step 5: Review
The final step is to review your pipeline and ensure all settings look accurate! If anything needs updated, simply go ‘Back’ in the workflow and update any step.
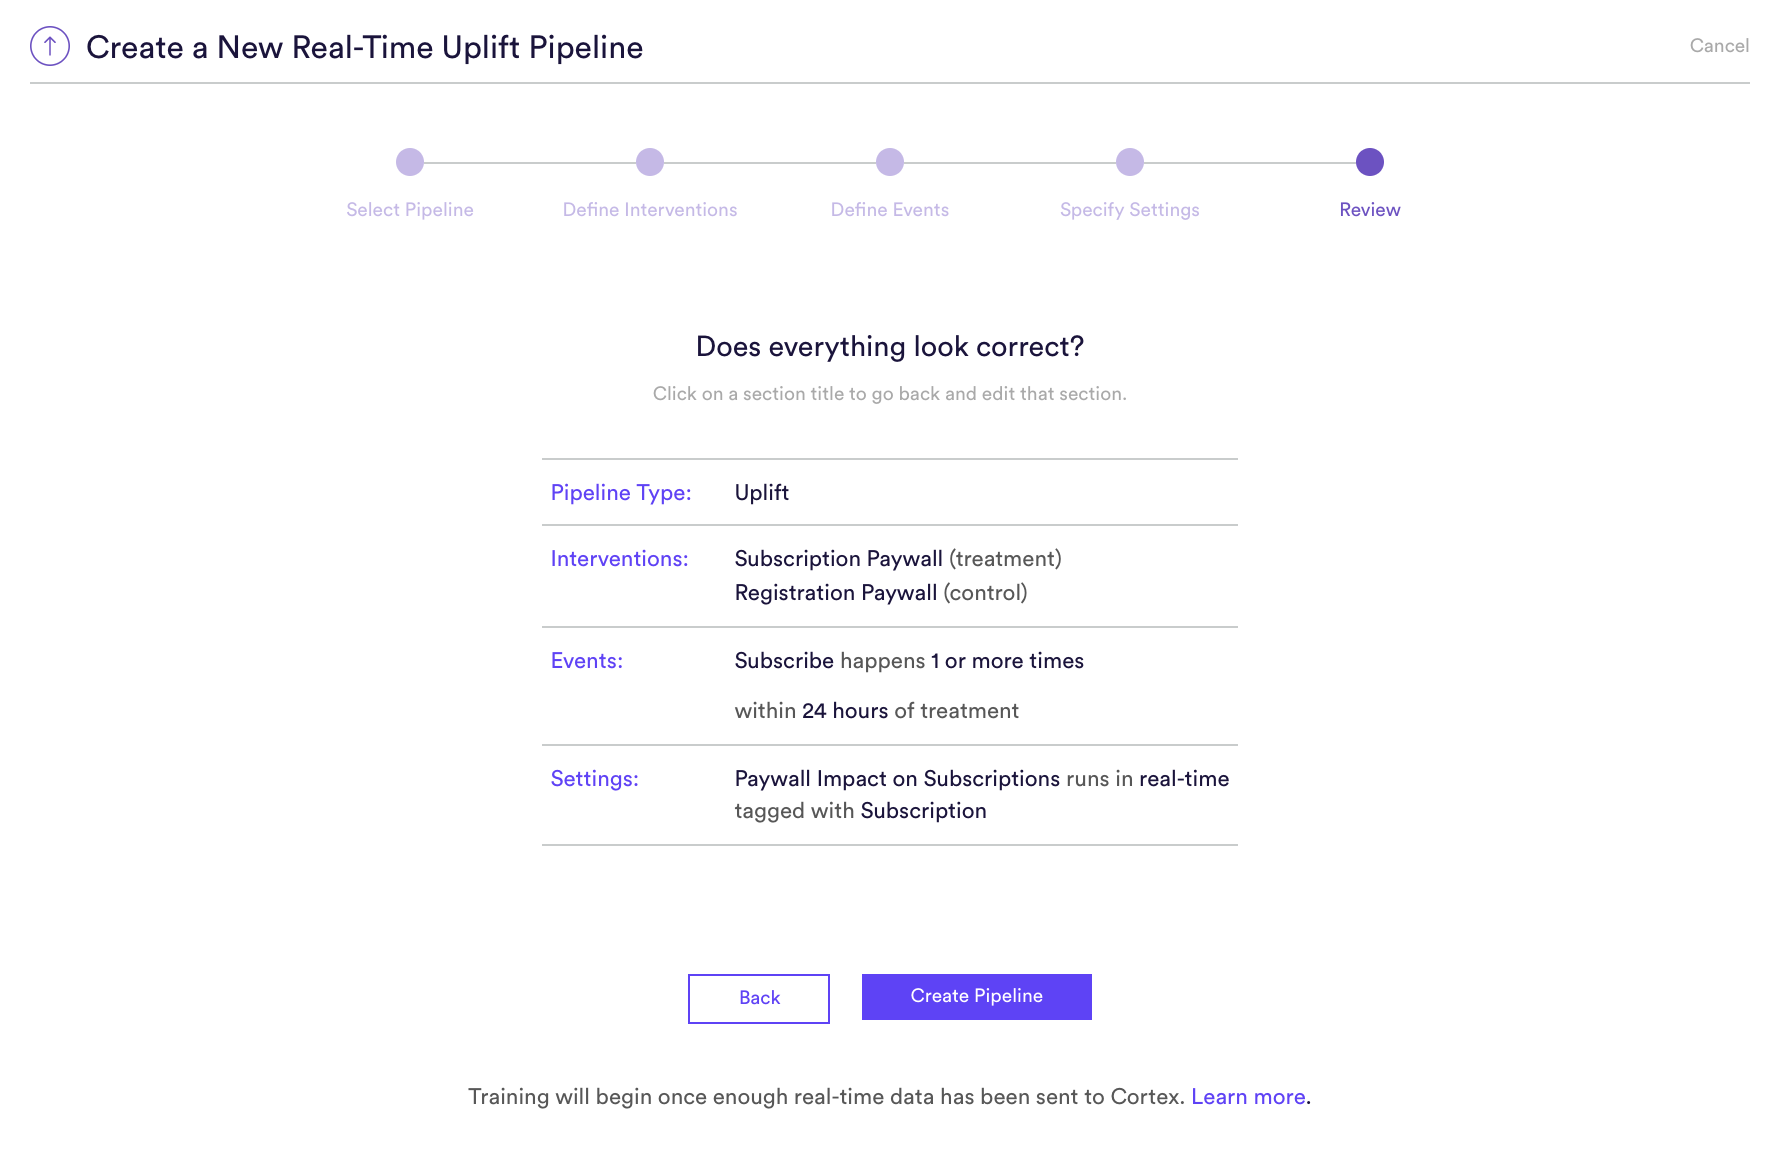
Note that because a Real-Time pipeline must gather additional data from users’ current browsing session, it won’t begin training right away. Instead, it will enter a “Data Collection Period” until enough data has been gathered to initiate training. Click here to learn more about this period, and how to begin sending real-time data to your pipeline.
Related Links
- Uplift Performance
- How to Build a Future Events Pipeline
- How to Build a Look Alike Pipeline
- How to Build a Classification Pipeline
- How to Build a Regression Pipeline
- How to Build a Recommendations Pipeline
Still have questions? Reach out to support@mparticle.com for more info!
